

See every booking laid out against the tables and times you have available, and manage them without leaving the screen.
Steps
-
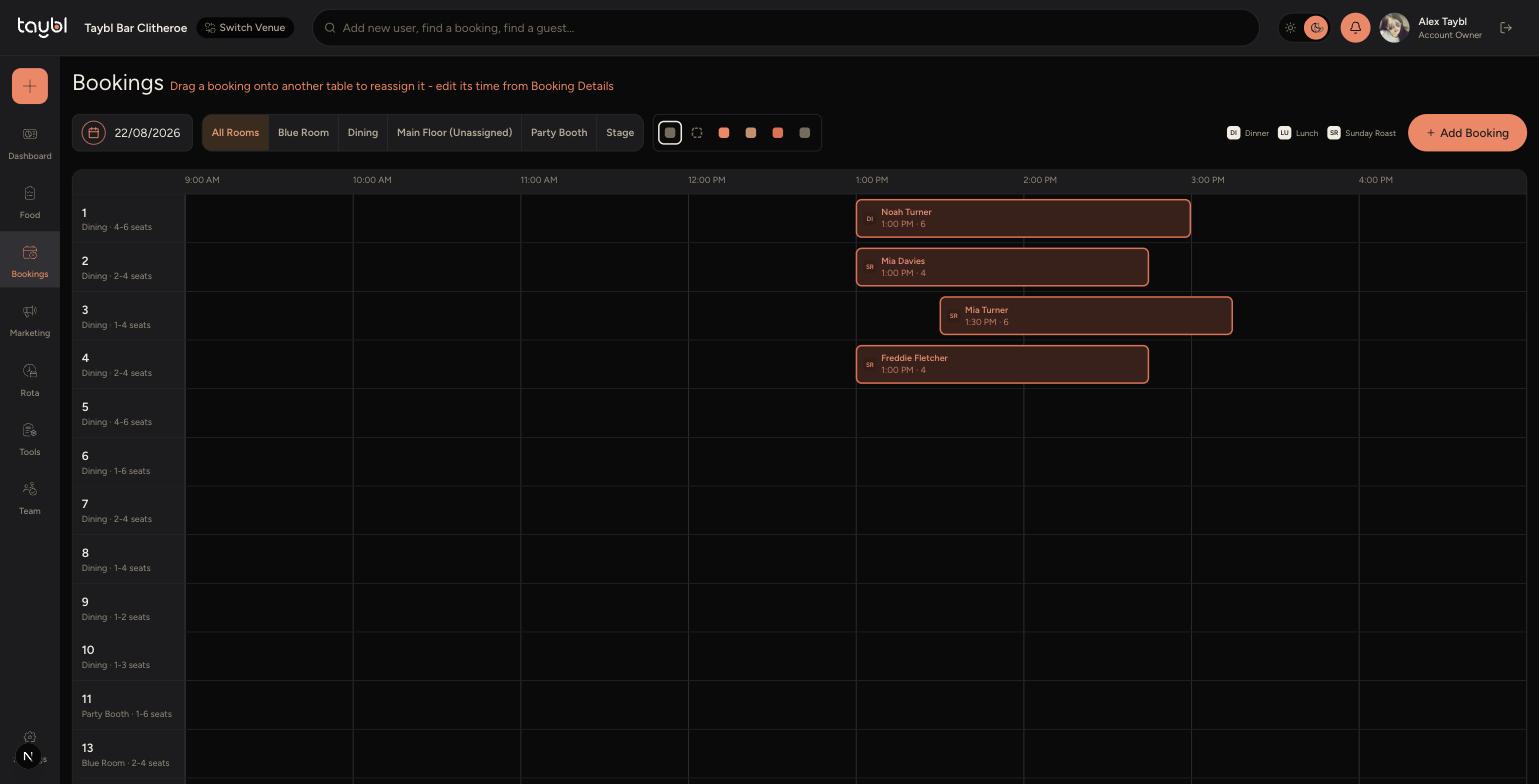
Go to Bookings - the Timeline is the default view, showing your tables down the left and time across the top.
-
-
Use the room tabs (such as All Rooms, Dining, Blue Room) to filter which tables are shown, and the date picker to move between days.
-
Each booking is colour-coded by booking type, shown in the legend at the top right (for example Dinner, Lunch, Sunday Roast).
-
To move a booking to a different table, drag it from its current row and drop it onto the new table's row.
-
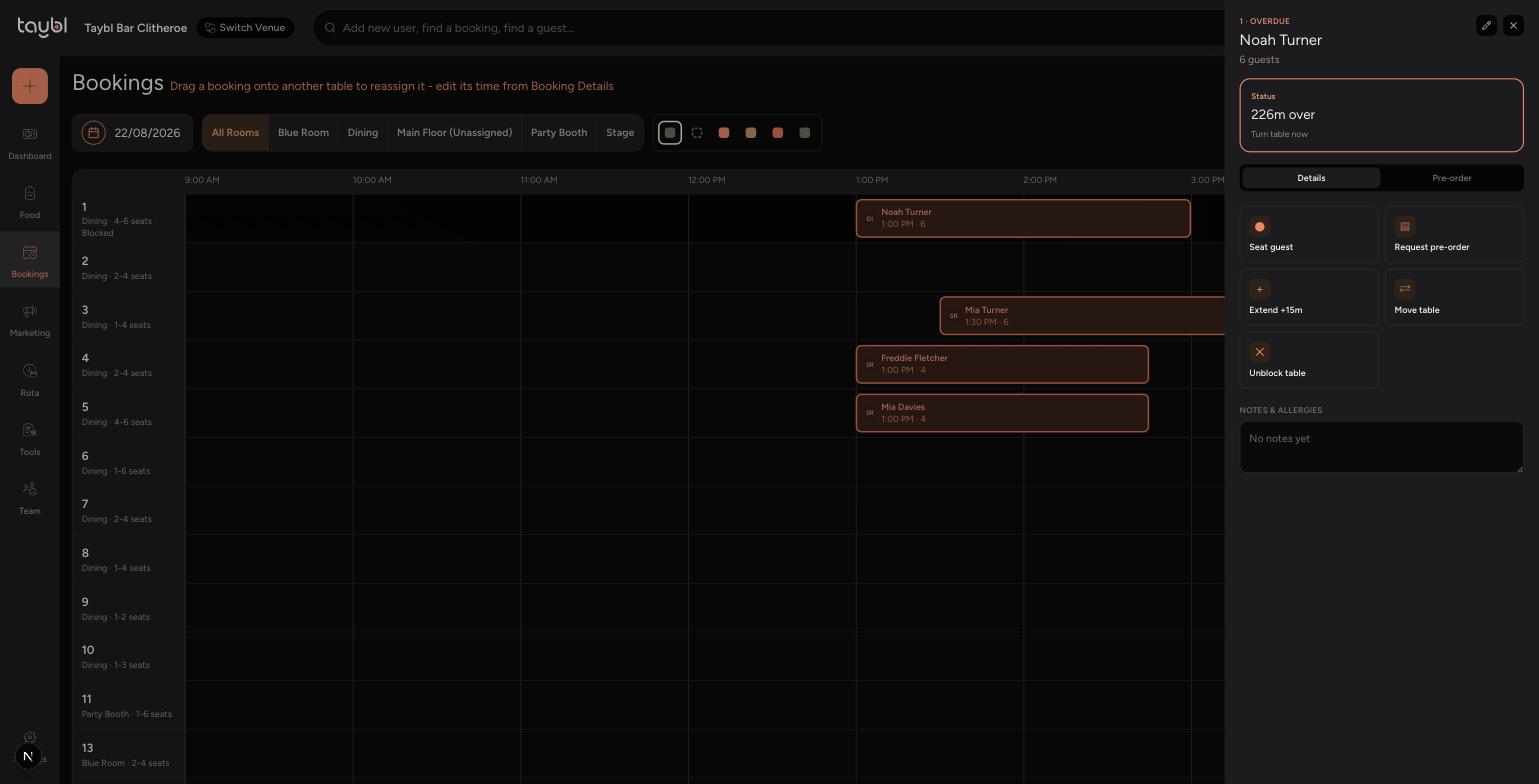
Click on a booking to open its details on the right: guest name, party size and current status (such as Overdue, with how many minutes over).
-
From the details panel you can Seat guest, Request pre-order, Extend +15m to give the table more time, Move table, or Mark blocked to take the table out of service.
-
Tap the pencil icon at the top of the details panel to edit the booking itself - its date, time and party size.
Tips
Extend +15m is useful when a table is running over but the guests haven't finished - it buys them a bit longer without you having to edit the whole booking.
Mark blocked takes a table out of service for new bookings - handy for a table that's broken, being cleaned, or reserved for staff use. Use the same button again to unblock it.
The banner at the top reminds you that you can drag a booking straight onto another table, and that a booking's time is edited from Booking Details rather than by dragging.