

Take bookings straight from your own website with an embedded widget, or share a standalone hosted page - both let guests self-book, and both can be customised to match your brand.
Steps
-
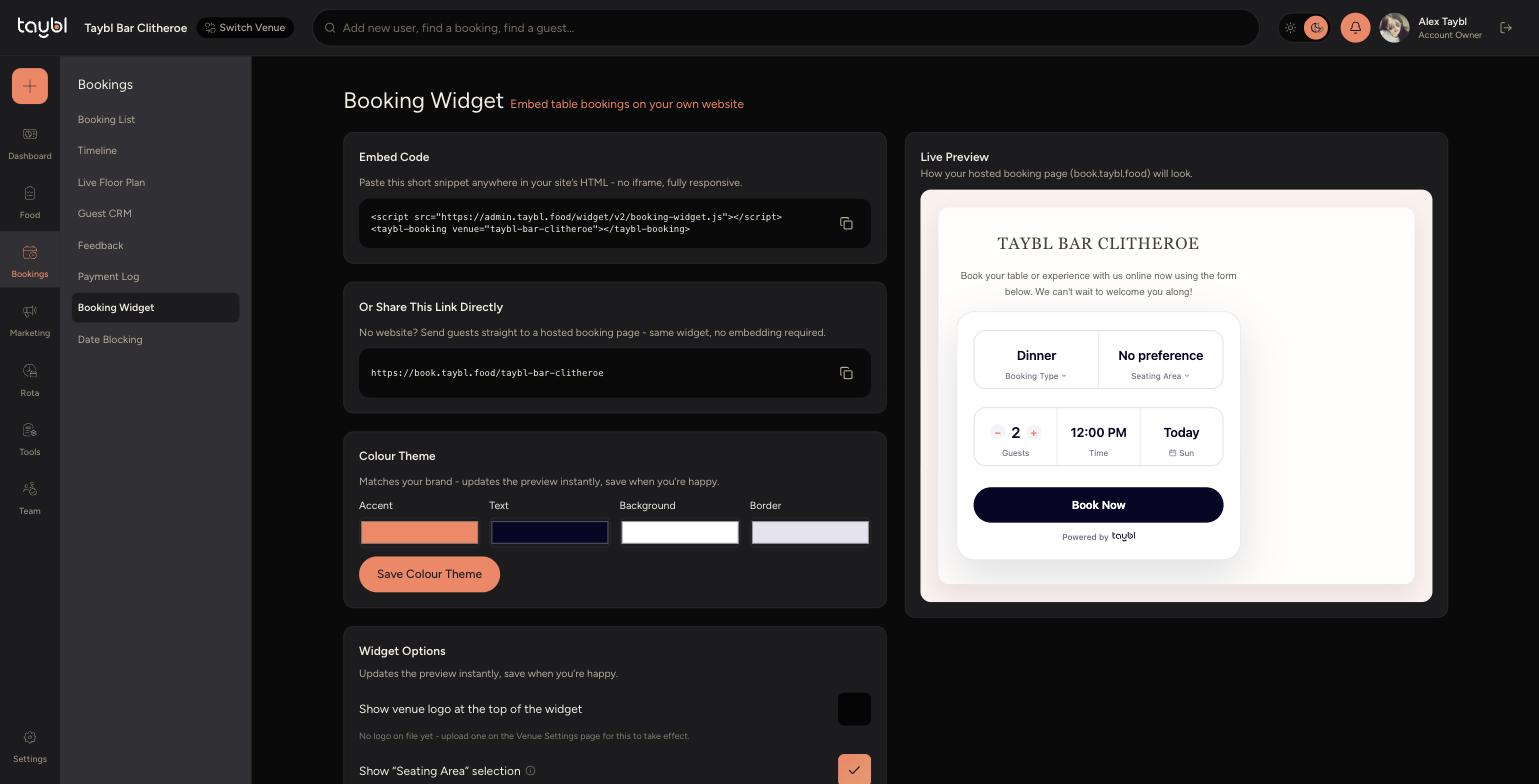
Go to Bookings, then "Booking Widget" to open your widget settings, with a live preview alongside.
-
Use "Embed Code" to paste the script tag anywhere in your own site's HTML - no iframe, fully responsive.
-
No website? Use "Or Share This Link Directly" to send guests straight to your hosted booking page instead.
-
-
Under "Colour Theme", set your Accent, Text, Background and Border colours to match your brand, then "Save Colour Theme".
-
Under "Widget Options", toggle whether to show your venue logo and a "Seating Area" selector, and customise the wording shown on the no-show/deposit step, then "Save Widget Options".
-
Under "Hosted Page Appearance", set a background colour and upload a photo - these only affect the hosted booking page link, not the embedded widget.