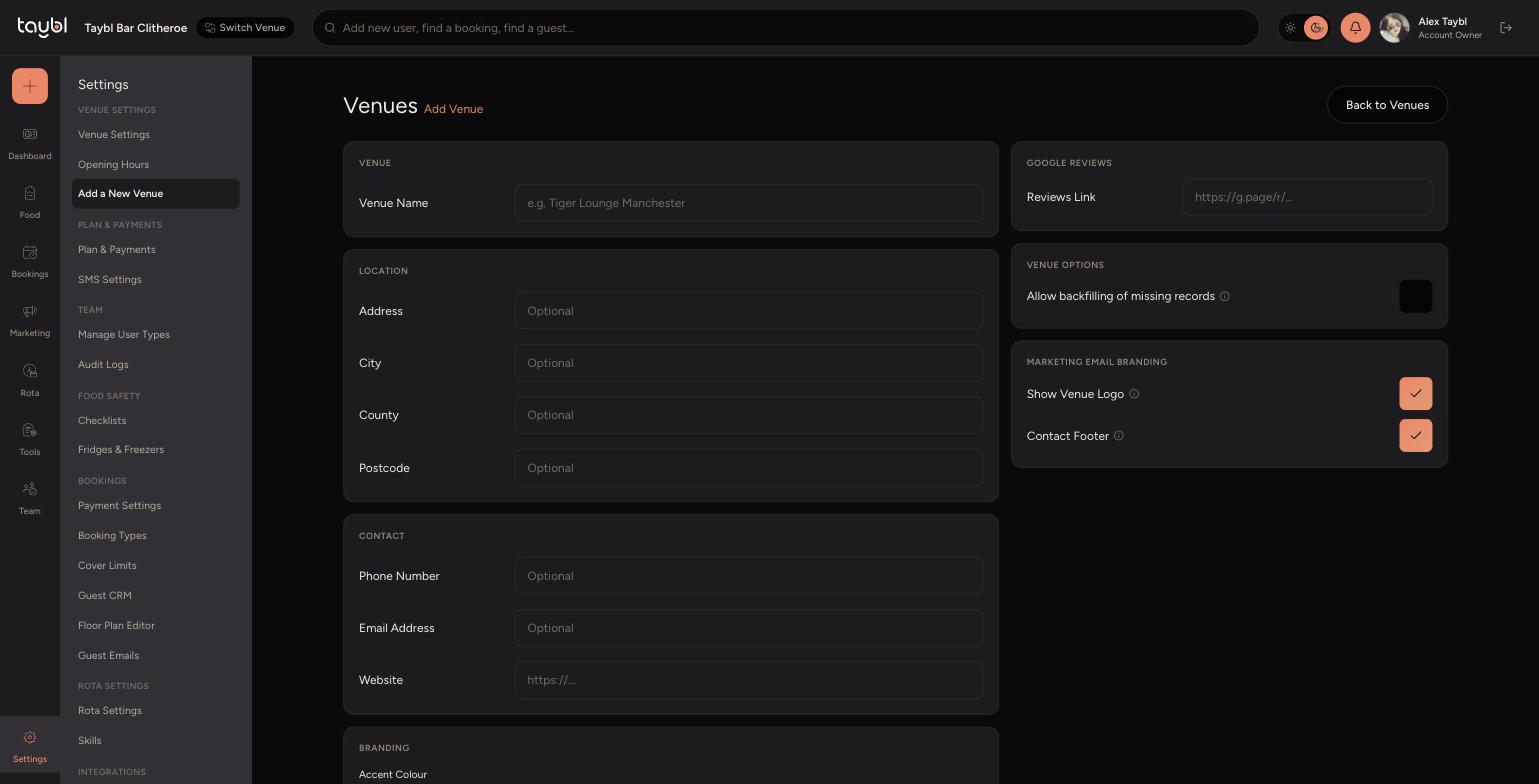

Bring a new site onto Taybl, from basic details through to picking its plan.
Steps
-
Go to Settings, then "Add a New Venue" under Venue Settings.
-
- Give it a Venue Name, this is required before you can continue.
-
- Under Location, add the Address, City, County and Postcode. All optional at this stage.
-
- Under Contact, add a Phone Number, Email Address and Website if you have them.
-
- Under Branding, set an Accent Colour, used in the venue's campaign and automation starter templates. Logo and icon uploads become available from Venue Settings once the venue exists.
-
- Optionally add a Google Reviews Link, and choose the Venue Options and Marketing Email Branding toggles for this venue.
-
- Click "Choose a Plan" to create the venue and move straight to picking its modules.
Choosing a Plan
-
"Choose a Plan" creates the venue and takes you to the "My Plans" tab under Plan & Payments, with the new venue shown ready to configure.
-
Click each module tile (Food Safety, Bookings, Rota, Marketing) you want the venue to have. See "Upgrade or Downgrade Plan" for more on how these tiles work.
-
The venue won't appear in a team member's venue switcher until they're assigned to it and log out and back in.
-