

Send a one-off email to a chosen segment of guests, from picking your audience to designing the email itself with the drag and drop editor.
Steps
-
Go to Marketing, then "New Campaign".
-
-
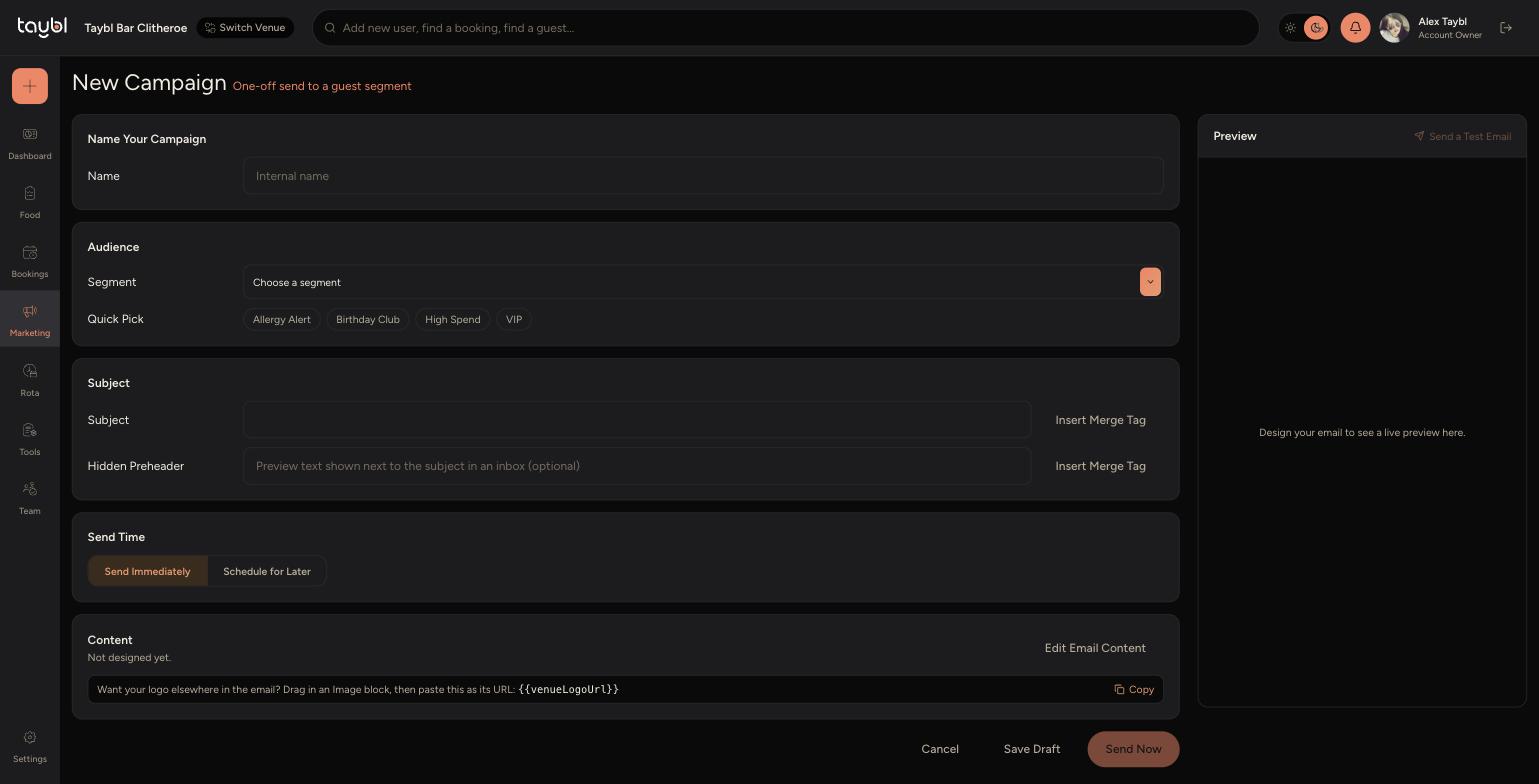
Under "Name Your Campaign", give it an internal name - guests never see this, it's just for your own reference.
-
Under "Audience", choose a "Segment" to target. Use a "Quick Pick" tag for a fast pick, or pick a saved segment from the dropdown.
-
Under "Subject", write the Subject line guests will see in their inbox, and an optional Hidden Preheader, the short preview text shown next to the subject in most inboxes.
-
Under "Send Time", choose "Send Immediately" or "Schedule for Later" and pick a date and time.
-
Under "Content", click "Edit Email Content" to open the drag and drop editor - you may need to save the campaign as a draft first if you have not chosen a segment yet.
-
Pick a starting point, a Plain Email, a Promotional Offer or an Event Announcement, then choose a design to build from, or "Start blank" for the simple branded layout.
-
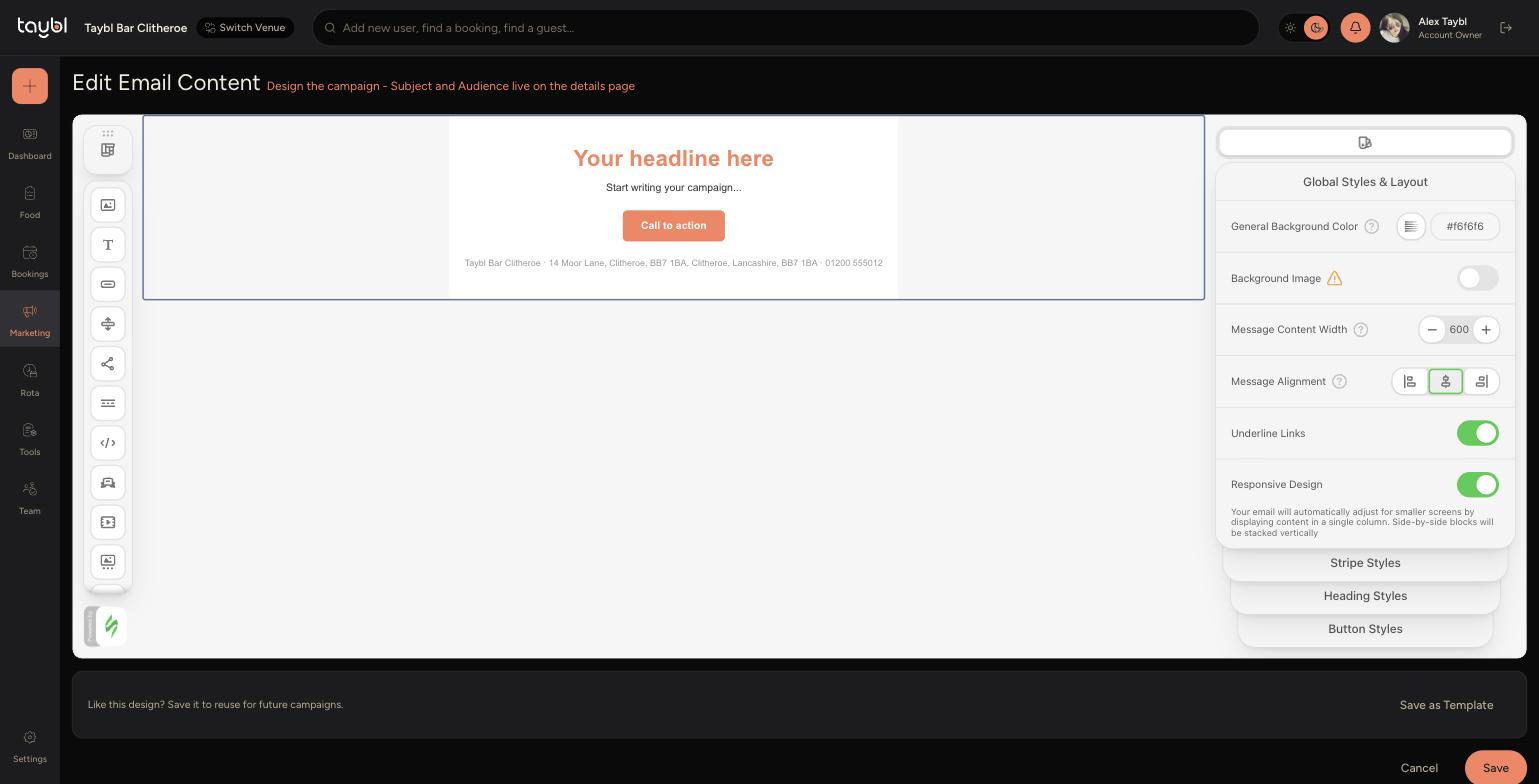
Choose "Start blank" to open the canvas. Drag blocks like Image, Text, Button and Divider from the left toolbar onto the layout, then click any block to edit it in the right hand panel, including colours, fonts and spacing.
-
When the design is finished, click "Save" to return to the campaign details page.
-
Back on the campaign page, choose "Save Draft" to finish it later, or "Send Now" if you set the Send Time to Send Immediately. If you chose Schedule for Later, this button will read "Schedule Send" instead.