

See a live, visual layout of every table, colour-coded by status, so you can spot who's free and who's overdue at a glance.
Steps
-
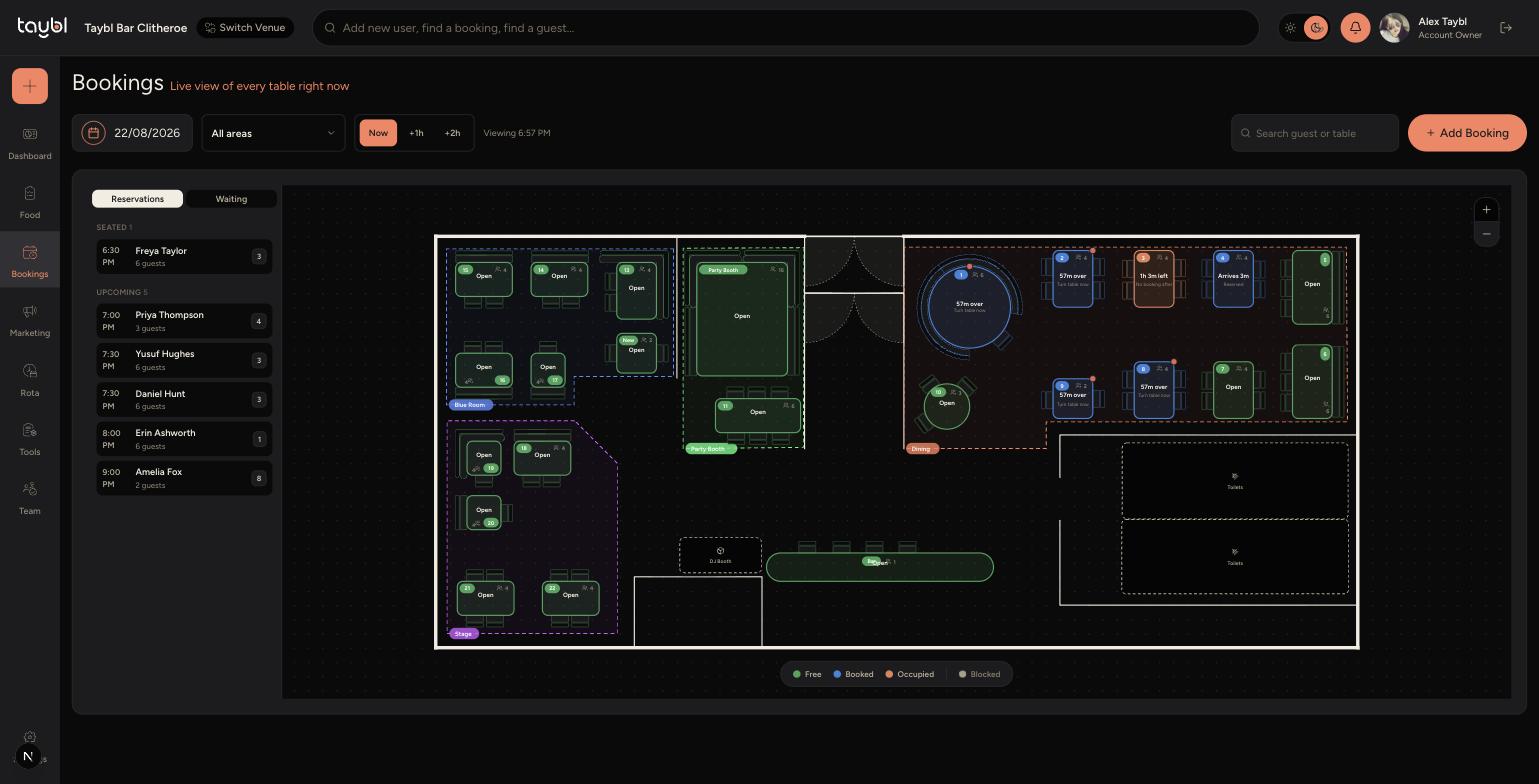
Go to Bookings, then "Table Plan" - or open it directly to see a live view of every table right now.
-
-
Use "All areas" to focus on a single section, such as Dining, Blue Room, Party Booth or Stage.
-
Use Now, +1h and +2h to check how the floor will look later in the sitting, not just right now.
-
Each table is colour-coded by status, shown in the legend at the bottom: Free (green), Booked (blue), Occupied (orange) or Blocked (grey).
-
Tables that are overdue show how many minutes over they are, so you can see at a glance which ones need turning.
-
Click on a table to open its options: Seat guest, Request pre-order, Extend +15m, Move table and Mark blocked, plus notes and allergies for the booking.
-
Use the Reservations and Waiting tabs on the left to see the day's bookings as a list alongside the floor plan, and "Search guest or table" to jump straight to one.
Tips
The Live Floor Plan and the Timeline show the same bookings - use whichever view suits you: the floor plan for a visual sense of the room, the Timeline for a clearer sense of time.
Stepping forward with +1h or +2h is a quick way to check you're not about to double-book a table that looks free right now.
Use "Search guest or table" when the venue is busy and you need to find one specific booking fast, rather than scanning the floor.