
Set up an automation once and let it run in the background, sending emails automatically whenever a guest meets a chosen trigger.
Steps
-
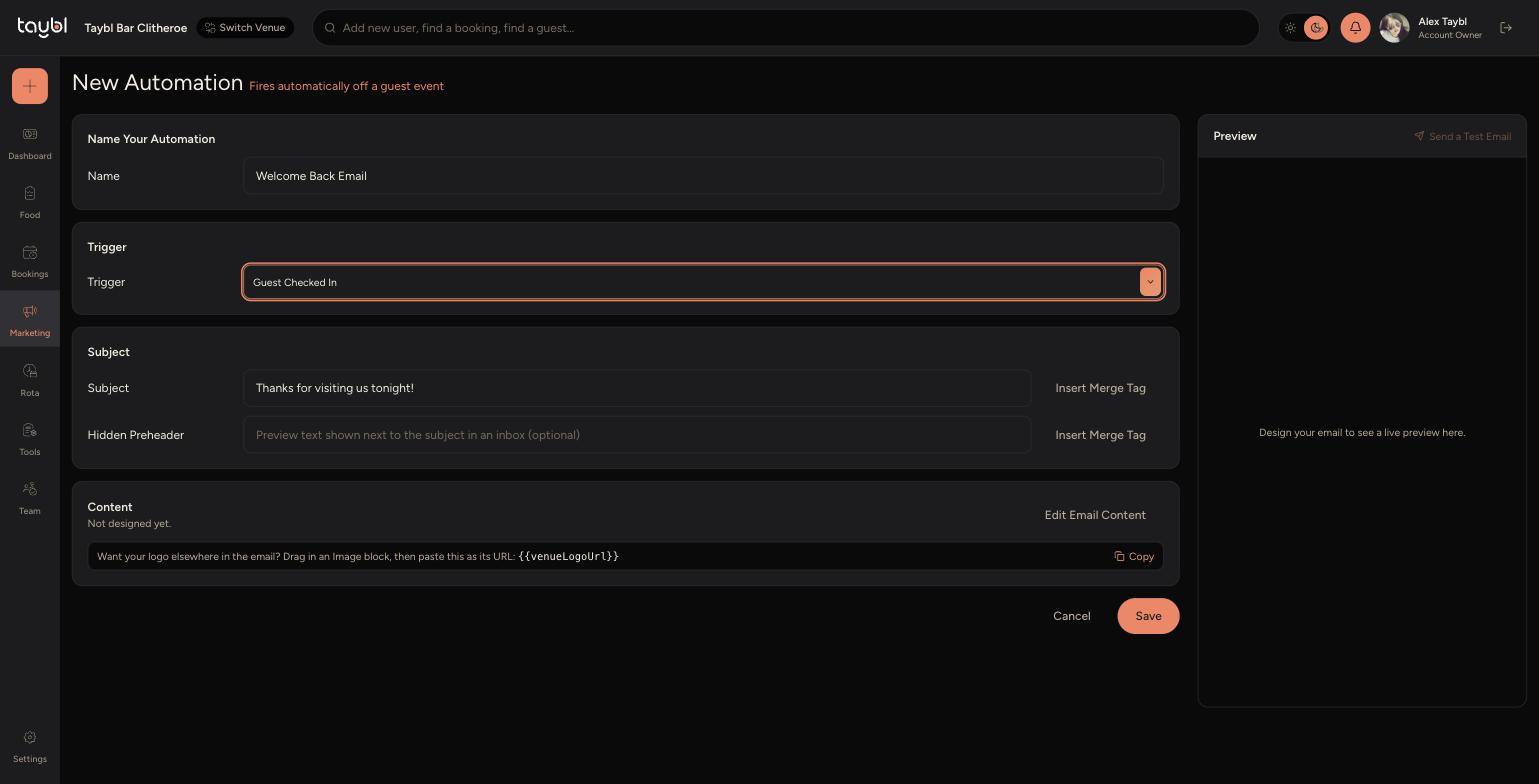
Go to Marketing, then "New Automation".
-
- Under "Name Your Automation", give it an internal name for your own reference.
-
- Under "Trigger", pick the guest event that should start the send. See the trigger list below for what each one means.
-
- Under "Subject", write the Subject line and an optional Hidden Preheader.
-
- Under "Content", click "Edit Email Content" to design the email in the drag and drop editor, the same way you would for a campaign.
-
- Click "Save". The automation is now live and will send automatically whenever the trigger fires, no need to send it manually.
What Each Trigger Means
-
Booking created - fires as soon as a guest makes a new booking.
-
Booking cancelled - fires when a booking is cancelled, by the guest or by the venue.
-
Booking completed - fires once a booking's visit date and time has passed.
-
Guest Checked In - fires the moment a guest is checked in at the venue.
-
First visit completed - fires after a guest's very first visit to the venue, useful for a welcome email.
-
Became a Regular - fires when a guest crosses the visit count that marks them as a Regular in your Guest CRM settings.
-
Became VIP - fires when a guest is marked or automatically qualifies as a VIP.
-
Birthday upcoming - fires a set number of days before a guest's birthday, so you can send an offer ahead of time.
-
Anniversary upcoming - fires ahead of a guest's saved anniversary date.
-
Negative feedback received - fires when a guest leaves low feedback, so you can follow up and try to win them back.