

Add a new starter to the team, assign them a role and venues, and Taybl handles sending them their own setup link.
Steps
-
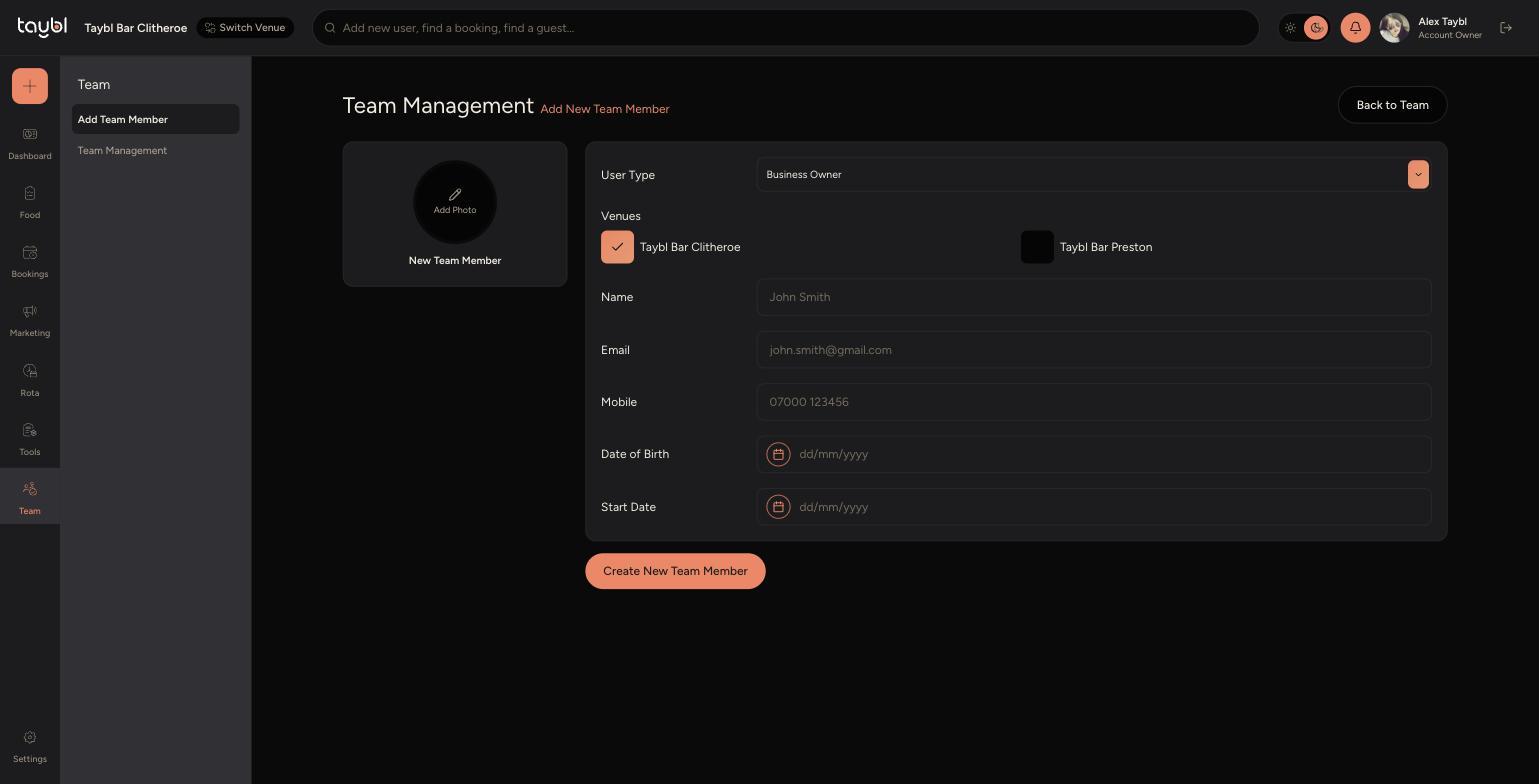
Go to Team, then "Add Team Member".
-
- Choose a User Type. This sets what the team member can see and do, and, once chosen, reveals a Venues checklist.
-
- Under Venues, tick every venue this person should have access to. Most staff only need one, but managers covering multiple sites can be given more.
-
- Fill in their Name, Email and Mobile.
-
- Add their Date of Birth and Start Date.
-
- Optionally, click "Add Photo" to upload a profile picture.
-
- Click "Create New Team Member" to finish.
What Happens Next
-
As soon as you create the team member, Taybl sends them a one-time link by email to set up their own profile. They use it to create a password and fill in anything you haven't already added, such as their own photo.
-
The link is single use and tied to that person, so each new starter needs to be added individually rather than shared from an existing account.